Introducing FantaMix: An Innovative DIY Ventilation Solution

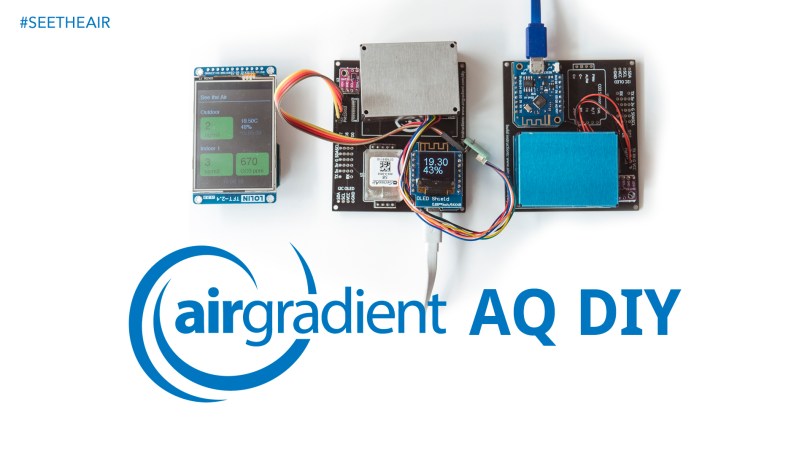
At See The Air, I am always excited to share innovative approaches to improving indoor air quality. Today, I am highlighting some fantastic articles by Nathalie Roussy that delve into the world of DIY ventilation with her in-depth work on the FantaMix.

FantaMix Review: A Look at Performance and Impact

Nathalie’s comprehensive review, titled “FantaMix Review,” was originally published on Medium. You can read her full article here.

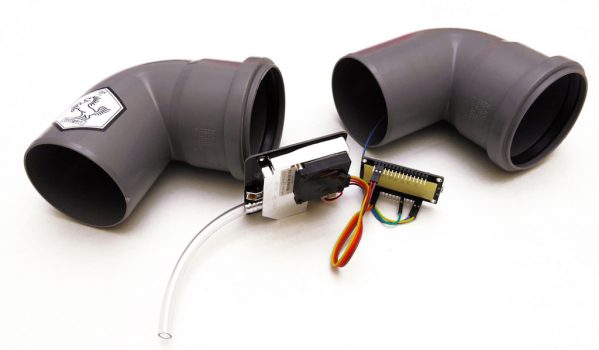
The FantaMix is a compact, open-source ventilation system designed for home construction at a low cost. Nathalie, who is the designer and tester of the FantaMix, explains how this hybrid device filters a mix of fresh outdoor air and stale indoor air through an H11 HEPA filter, all while recovering lost heat. It functions as both a source of fresh air and an indoor air purifier.

Her article covers the origins of the FantaMix, how it works, and the results of various field tests, including airflow rate, noise level, heat recovery, and power consumption. She also provides a comparison with similar devices and a visual analysis of CO₂ levels to demonstrate its impact on air quality. Nathalie emphasizes that the FantaMix is a DIY project, offering an accessible solution for enhancing indoor air quality, particularly for renters or those with budget constraints, and is especially beneficial during events like wildfires.

Building the FantaMix: Your Step-by-Step Guide

For those inspired to build their own FantaMix, Nathalie has also published a detailed DIY guide titled “Building the FantaMix: Fresh Filtered Air at Home — No Exhaust, Under $200,” also available on Medium. Find the complete guide here.

This step-by-step open-source guide outlines how to create this affordable and effective home ventilation system. The FantaMix aims to provide fresh, HEPA-filtered outdoor air with partial heat recovery, costing under $200 and requiring no major construction or exhaust system. The project is 100% open source, promoting accessible knowledge over opaque products. The article covers the detailed construction process, including building the base, assembling the top section, preparing the outdoor air intake panel, and installing components like fans, insulation, and wiring. It also includes a detailed cost breakdown, a list of essential and optional tools, and crucial safety precautions, especially when working with materials like heated foam. Maintenance tips for filter replacement and fan cleaning are also provided.

I am particularly proud to note that Nathalie’s work on the FantaMix was inspired by our very own article, “DIY Ventilation Solution for Renters.” It’s wonderful to see how shared knowledge and innovation can lead to such practical and impactful solutions for healthier living spaces.

We highly recommend reading Nathalie’s articles to learn more about the FantaMix and consider it as a potential DIY project for your own home!

A DIY Ventilation Solution for Renters

Renting an apartment often means limited control over modifications, especially when it comes to essential systems like ventilation. Poor indoor air quality can significantly impact health and well-being, but drilling holes for traditional ventilation systems is usually out of the question. This article presents a simple, affordable DIY project using a standard air purifier to bring fresh, filtered air into your rented space without any permanent alterations.

The Problem: Stale Indoor Air and Renting Restrictions

Old apartments but also modern, energy-efficient apartments can sometimes suffer from poor ventilation, leading to a buildup of indoor pollutants like CO2, volatile organic compounds (VOCs), and particulate matter. While opening windows is a simple solution, it’s not always practical due to weather, noise, or outdoor air pollution. Renters often face the added challenge of not being allowed to make structural changes, ruling out traditional ventilation installations.   

The DIY Solution: Air Purifier Ventilation

This project uses a standard standalone air purifier in a novel way to introduce fresh, filtered outdoor air. The key components are:

  • A Standard Air Purifier: Choose one with a HEPA filter for particulate matter and a carbon filter for gases. Programmable models are highly recommended for automation.
  • Flexible Tubing and Window Adapter: These connect the air purifier’s intake to a slightly opened window. You can find suitable tubing and adapters at most hardware stores for around €15.
Read More »

Review: M5Stack K131 AirQ – All in One Portable Air Quality Monitor

The M5Stack K131 AirQ is an all-in-one air quality monitor designed for easy and comprehensive monitoring of your environment. It is a portable air quality monitor and an ideal companion for those who want to track their exposure to environmental pollutants.

Characteristics

Pros:

  • Multi-sensor: It goes beyond basic temperature and humidity readings, offering detailed readings on PM1.0,PM2.5, PM4, PM10 particles, VOCs, NO2, and CO2 concentration. This gives you a holistic view of your air quality.
  • E-ink display: The easy-to-read e-ink display provides clear visuals of the monitored metrics, even in low light conditions. Even in a power outage, the last screen will still be visible.
  • Versatile mounting: LEGO mounting holes, magnets, and detachable hanging ears offer various installation options for different environments.
Read More »

AirGradient DIY Indoor & Outdoor Air Quality Monitor

Countless times I have mentioned that we need to monitor indoor and outdoor air quality. This is an essential step in order to have a holistic approach to air pollution that surrounds us in both environments. Unfortunately, not everybody can afford to buy two monitors but thanks to the community and AirGradient there are two DIY solutions that can help us monitor the air quality quite accurately and of course, manage the air we breathe better.

AirGradient’s DIY solution is more appealing than the competition for many reasons. First of all, you can buy directly the DIY Kit with all the electronic components from them including the PCB. The PCB is the board where we will deploy all the sensors, WiFi module, and display. That is a huge benefit because you don’t have to search on the internet and purchase the components one by one. The well-designed PCB will also help us keep the monitor neat and small without unnecessary cables. Secondly, Air Gradient’s DIY AQ Monitor is very customizable allowing us to build an indoor monitor with an NDIR CO2 sensor but another one without a CO2 sensor or display for the outdoor environment. If you don’t want temperature/humidity sensors you can easily omit them too, but I highly recommend them. Moreover, there is software support as a community of passionate people have been improving the firmware constantly. Finally, the solution comes with a web dashboard where you can manage all the monitors and take advantage of the histograms and tools like the alerts.

Additionally, the devices which are connected to the cloud and the dashboard can broadcast the measurements back to a separate display (Viewport) which allows us to see the air quality indoors and outdoors like in the example below. Isn’t that very cool?

It has been a long time since I soldered something, so I was very happy to build the monitor. I built two monitors by following the fairly easy instruction here. There is also a video with the instructions here by Jeff Geerling.

Read More »

OK Lab Stuttgart – PM DIY Monitor

An Outdoor PM DIY Monitor

Do you think the current PM (Particulate Matter) monitors are too expansive or too risky to leave them outside? Do you need proofs for convincing your local authorities to take actions against air pollution?

Then it’s time to build your own personal outdoor PM DIY Monitor. It won’t cost you more than €32 and it can feed your community with valuable data about the air quality. Use that data to prove how bad is the air quality in your neighborhood or community.

Read More »