
The Call for Volunteers was a great success and I had the chance to learn from you a little more about the problems of air pollution around the globe and the situation each one of you faces. From Canada, USA, Mexico, Australia, New Zealand, India, Romania, Italia, France, Belgium, Greece, Denmark, UK, Finland, Serbia, Spain, Ireland and many many other places. It wasn’t an easy task to select the 10 volunteers as all of you gave me good reasons. I want to THANK YOU all, it really means a lot your offer to raise awareness on such an important problem.
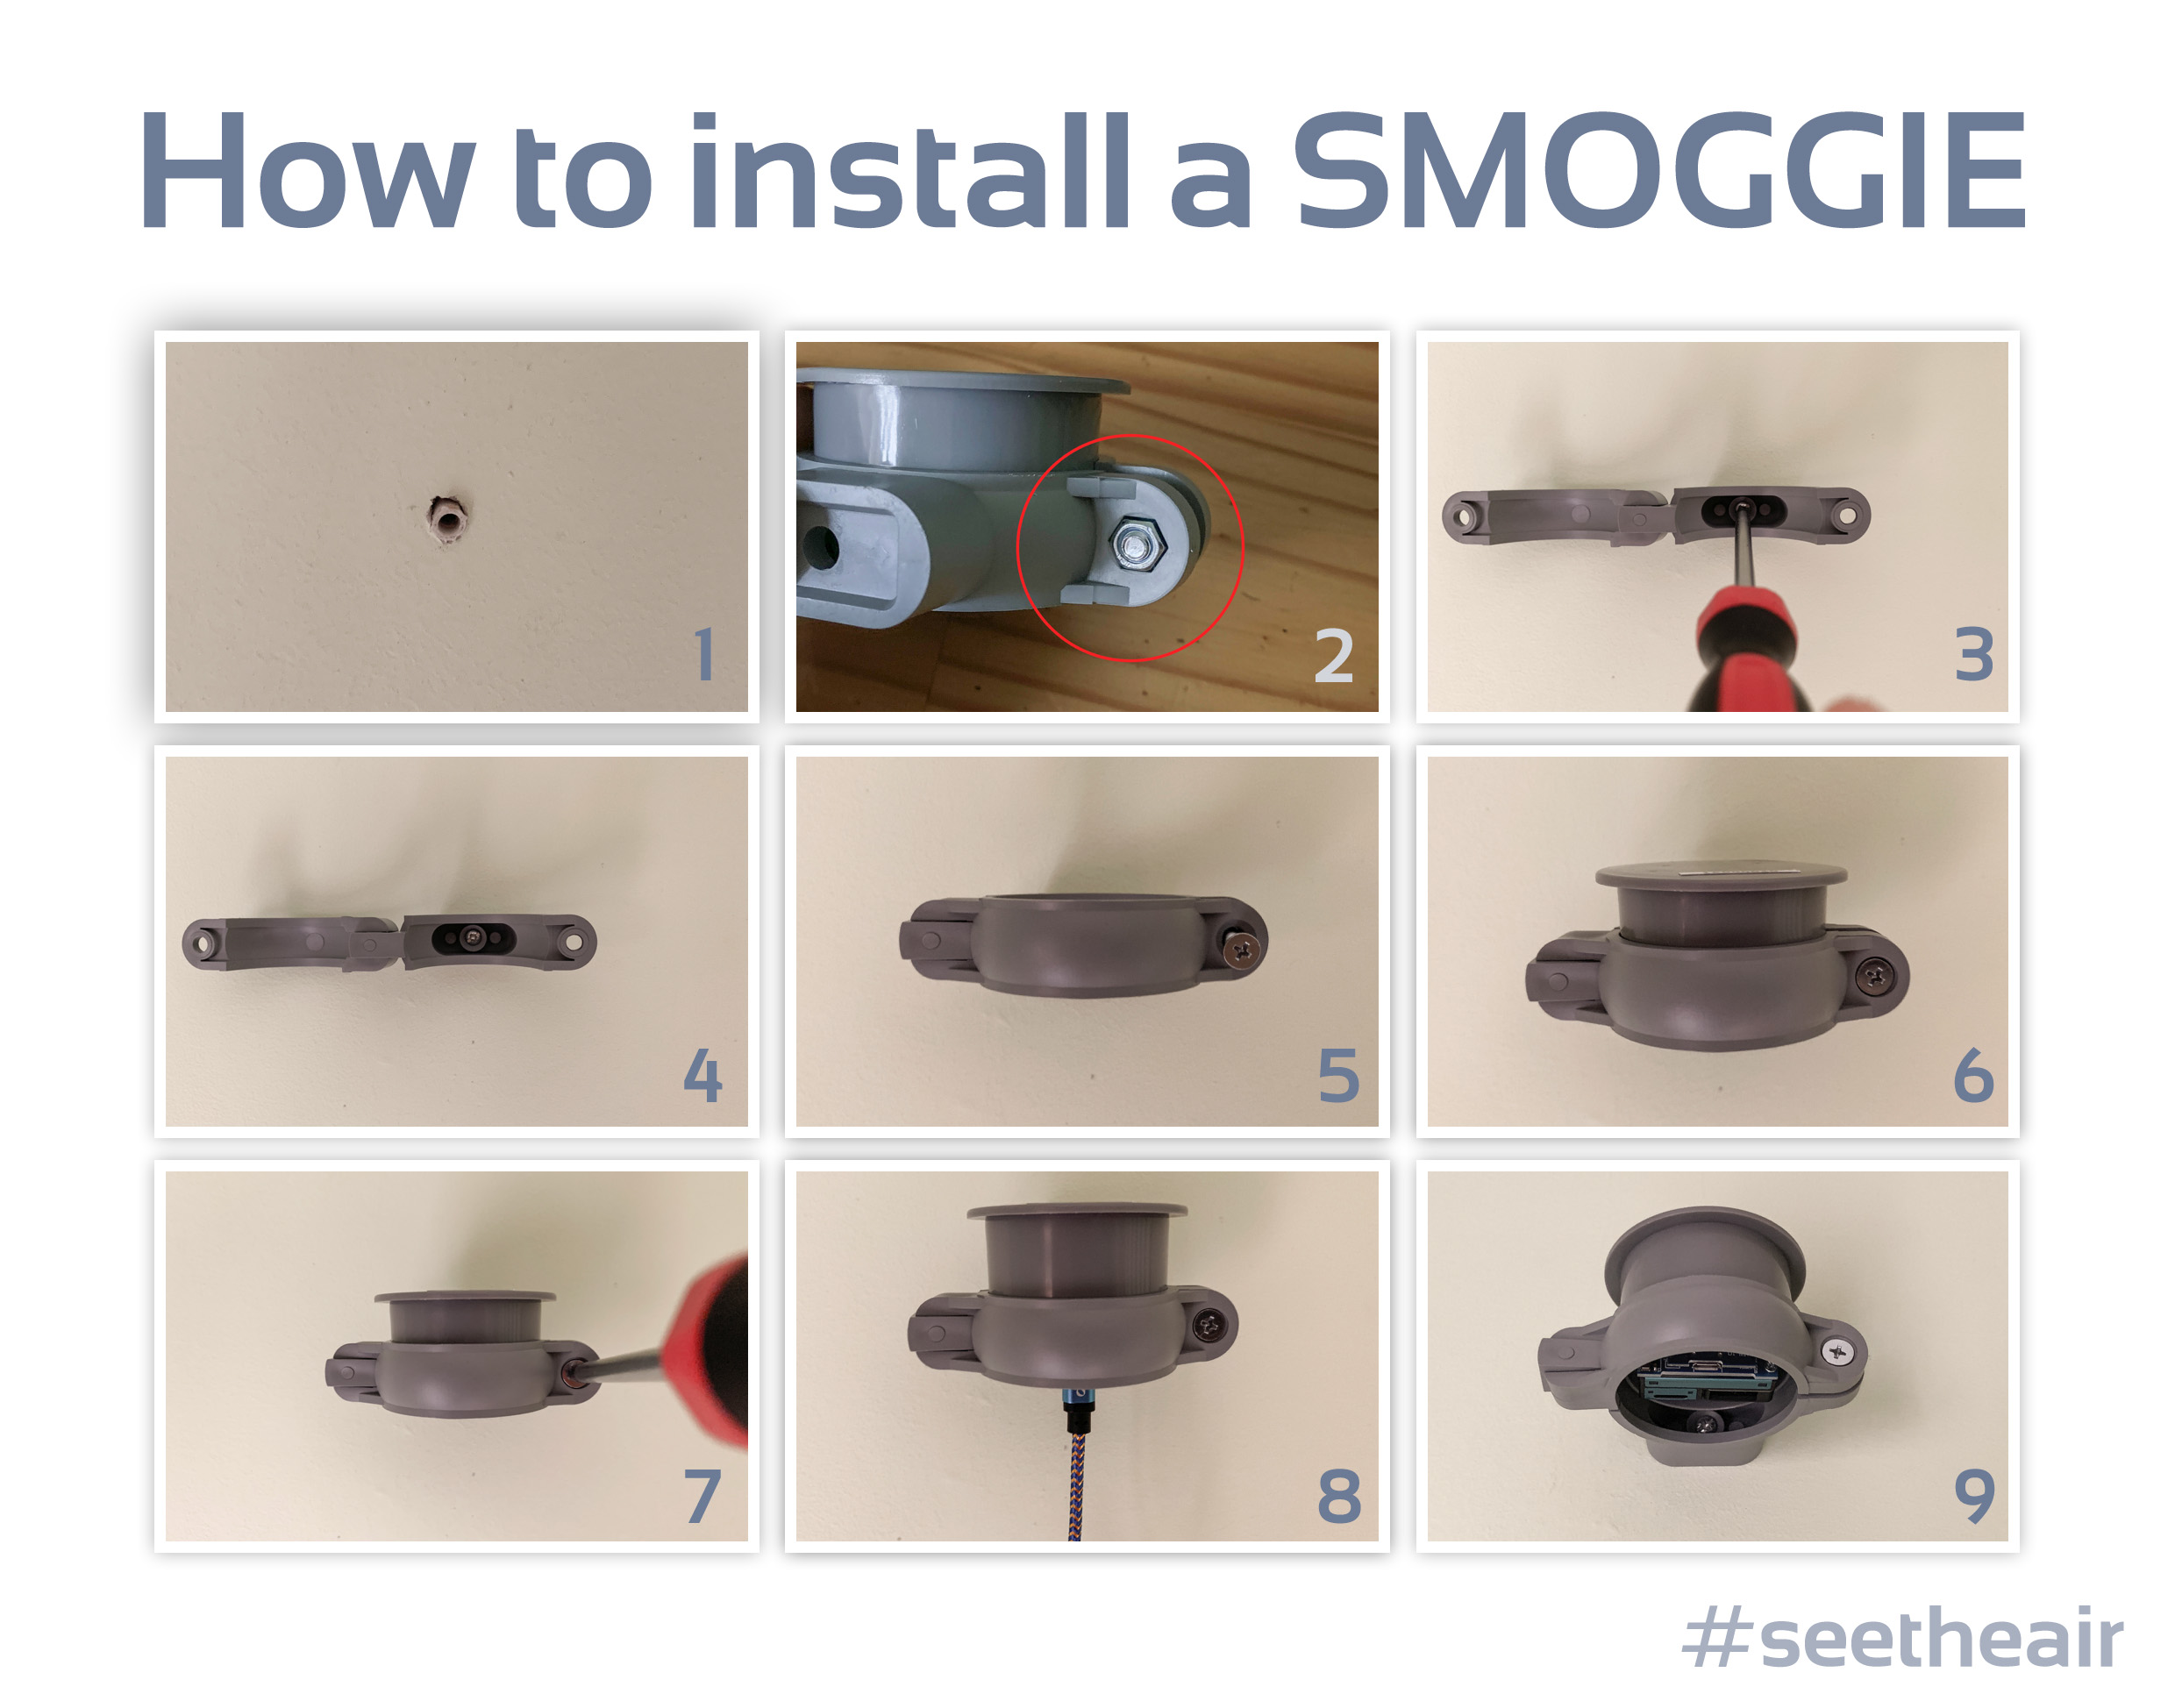
I have prepared a quick guide on how to install a SMOGGIE on an outdoor wall in 9 easy steps with images. The SMOGGIE is rainproof for this reason you just need to install them with the opening facing down.
Installation Guide
You will need a screw anchor (if you mount it on the drywall, you don’t need it for a wooden wall), a screw, a drill and a Philips screwdrivers.
1. Make the hole and put a screw anchor inside.
2. Unscrew the stainless steel hex bolt with the help of the screwdrivers and keep it somewhere safe. It can be lost very easily or it can be dropped from the balcony. (True story, be careful)
3. & 4. Screw the base on the wall.
5. Put the hex bolt back to its original place and screw it loosely.
6. Place the SMOGGIE inside.
7. Thigh the hex bolt in order to keep the SMOGGIE safe in place.
8. & 9. Plug-in the micro-USB cable. Vualà!
Once you have placed everything correctly and the device is plugged into the power adapter follow the next steps.
Wait for a few seconds and open the WiFi settings on your computer or tablet or phone and search for the SSID uRADMonitor-XX, where XX are the last two digits of the device ID number. The password of the SSID is the same as the ID number.
Now open you favourite web browser and type into the URL 192.168.4.1

The above page must appear once you type the URL and hit enter. Click on the CONFIG.
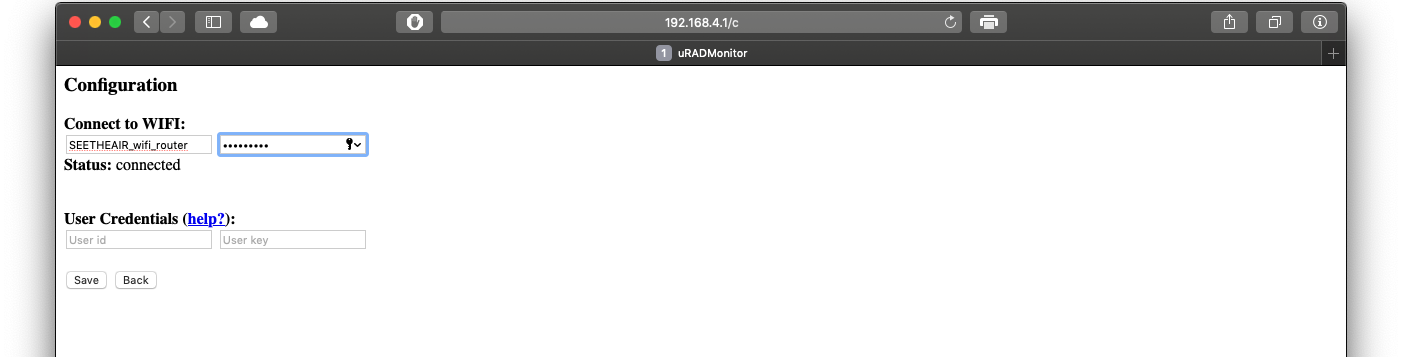
Inside the Connect to WIFI add the information of your router WiFi, the SSID and the password and click Save. Disconnect your computer or tablet or phone from the uRADMonitor-XX SSID and you are ready. Congratulations your air quality monitor is up and running.
10 SMOGGIES
Here are all the links for the 10 SMOGGIES that the volunteers have around the globe, please remember to keep your devices on 24/7 because others will benefit from the AQ information.
- Munich, Germany
- Leeds, UK
- Guatemala
- Kozani, Greece
- Aalborg, Denmark
- Belgrade, Serbia
- Bucharest, Romania
- Barcelona, Spain
- Squamish, Canada
- Currently Unavailable
Open Source
The SMOGGIE project is open source and some of you have already asked me for the code because you have already got the hardware. In this case please contact uRADMonitors.
Discover more from See The Air
Subscribe to get the latest posts sent to your email.

[…] the past 6 months, Smoggies are operating and providing useful air quality insights to the users and the communities all around […]
LikeLike
[…] update to the Local Haze app also benefits Smoggie users and especially my volunteers around the world since it allows users to view and monitor the data from these […]
LikeLike